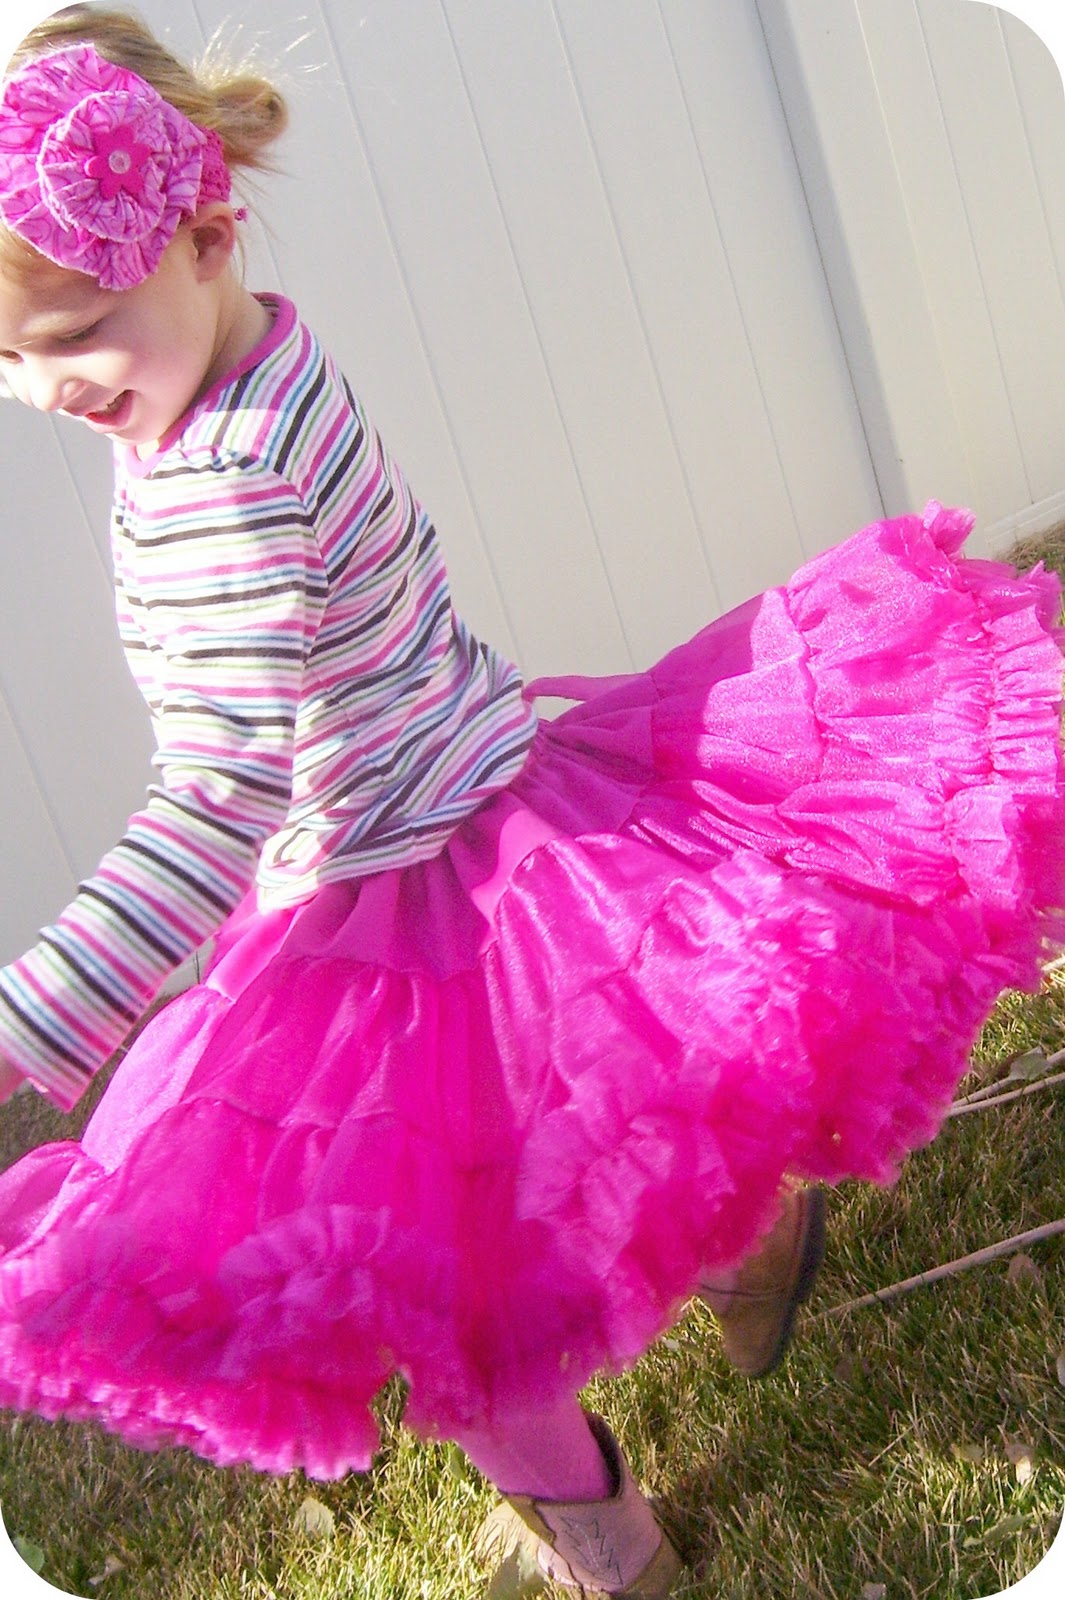
Pink and ruffly and twirly and So. Much. Fun. Yep, that describes this skirt perfectly.
I made this skirt for Zoe about a year and half ago.....
Oh! Look at her. She's so small! I found the tutorial for this fabulous fluffy skirt at Made by Bronwyn. And while it did take a fair amount of time ruffly all that wonderful chiffon fabric, it was pretty easy. And so worth it.
Wouldn't this make such a fun Christmas gift for a little girly girl?
It's so cute watching Zoe wear this skirt.
She can't help swishing around as she walks.
And, of course, it's great for twirling.
I had to include this last shot.
Do you think this pose will catch on with other models?
Months and months ago, my kids and I decided to try a craft from one of our favorite books, Best of FamilyFun Crafts and Boredom Busters.
It was making our very own Eric Carle Collages. Eric Carle....wow, right? Illustrator of Brown Bear, Brown Bear What Do You See? (which has always been a favorite of my children) and author/illustrator of The Very Hungry Caterpillar as well as many many other books. I've always been fascinated with his technique. What a brilliant man!
I couldn't find the craft on FamilyFun's site to link to, but here's a video to help explain it....
We used white printer paper instead of tissue paper. But I'd like to try the tissue next time. It'd be fun to see how this changes the texture of the collage. And I also think it would be easier to layer pieces. I wonder if it would rip easily though. Especially with kids in on the process.
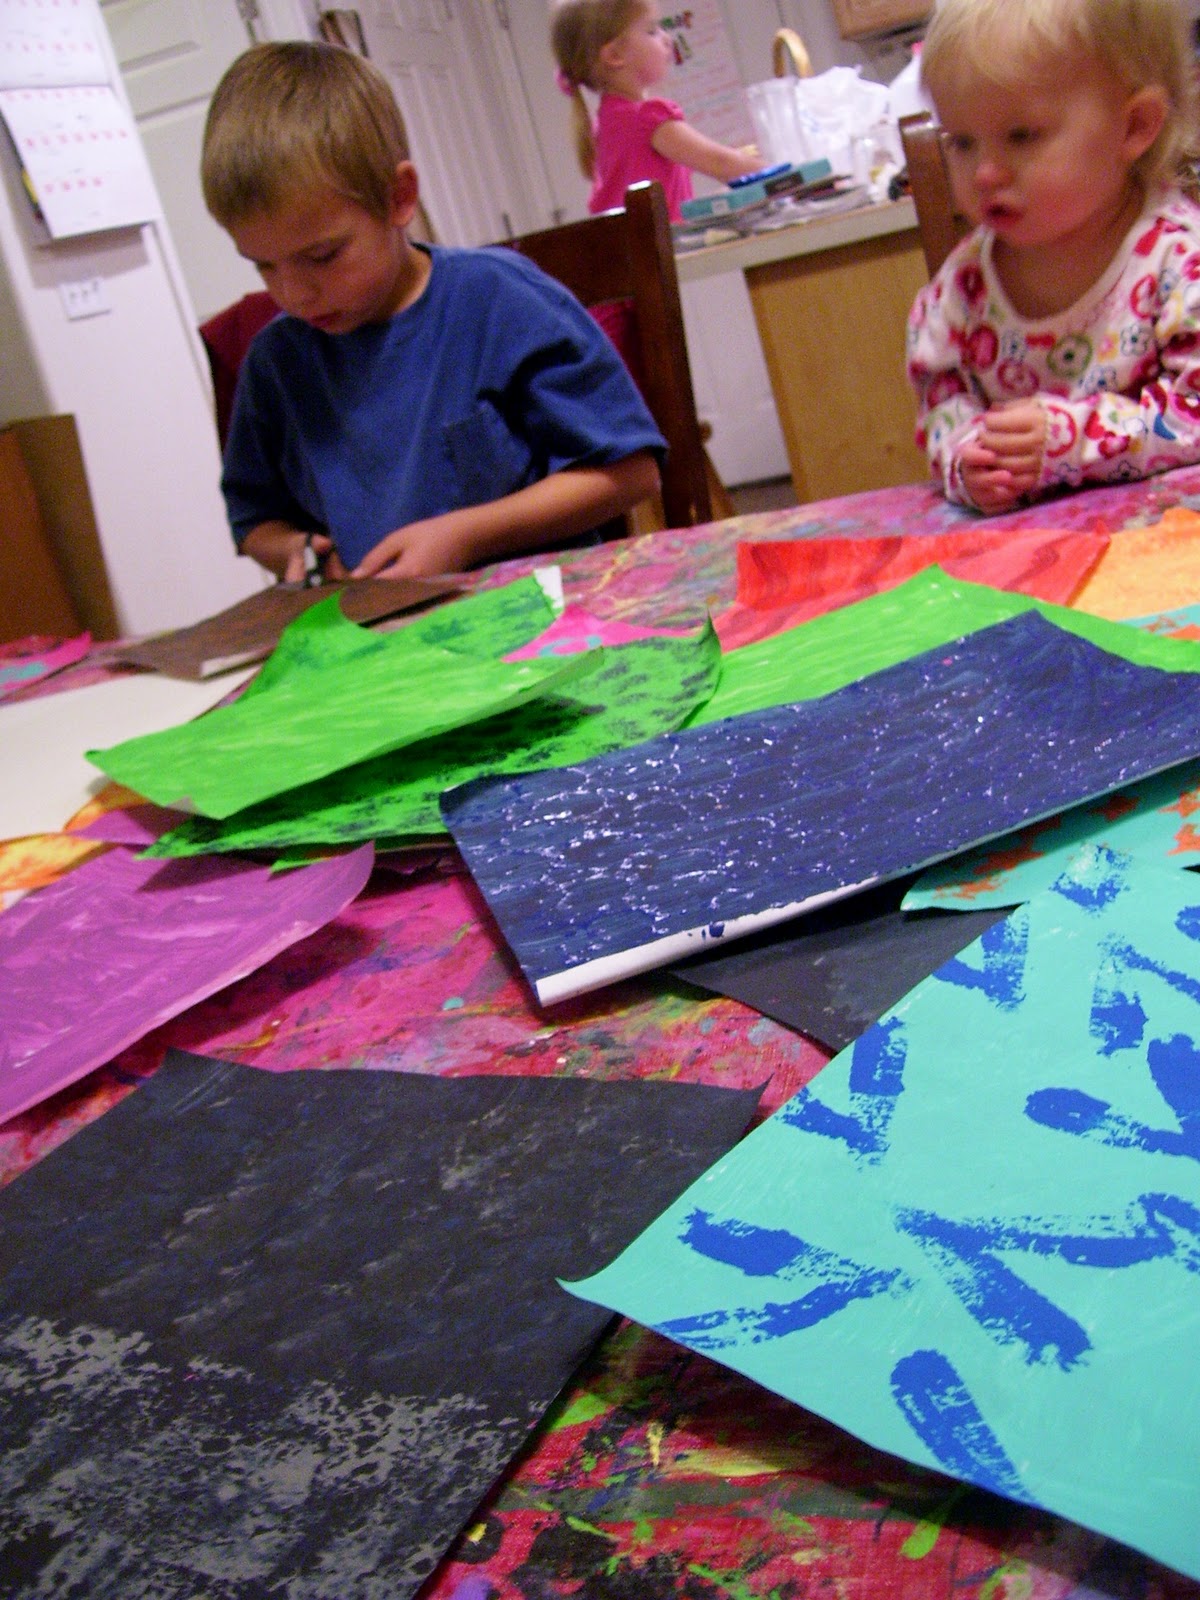
So, anyway....like I said, months ago we started this project. We gathered the paper and the paint and then we rummaged around the house for all sorts of things we could dip in paint and stamp on the paper. We drove trucks through paint and onto paper. We tried old spools. We stamped with the green plastic flower part of fake flowers. We found a star foam shape and tried that. We went wild with paint brushes, letting ourselves splatter the paint in every which way we wanted onto the paper.
It was quite a bit of fun.
Then we let the paint dry. And we kept meaning to get back to this project. And then....the papers got moved to the basement.
And forgotten.
Until Tuesday night! I pulled them out and Sam, Zoe and I got busy (Weston was elsewhere and Emmett was in trouble, sadly, and had extra chores).
Zoe is struggling to finish her dinner there in the background so she could get in on the collaging fun.
It took her awhile to choke down dinner though. So, she had to finish her masterpiece the next morning. And for some reason she likes to wear her brother's old tie-dyed t-shirts for jammies.
Sam had a great time making this rockin' awesome robot....
Apparently he is mad because another robot pushed him in the back. You think he could just get even with his Laser Eyes of Death....or maybe one of those handy buttons on the front there?
Zoe made a princess.....(you, of course, recognized what it was right away. It's not like I needed to tell you , right? Of course not.)
And I couldn't be left out of the fun....
I probably should have been doing something useful like dishes or laundry or discovering the kitchen counters I lost 3 months ago....I know they're around here somewhere. I just can't seem to reach them because of the massive piles of junk in the way..... But who wants to tidy things? Nah, cutting paper and gluing is way more fun.
This was a great way to spend the evening with my kids (well, a couple of them anyways....).
I'm planning on putting the kid's pictures up on our museum wall (that's where our artwork goes) and I just might put mine there, too!
Here's another video about Eric Carle and his fun artistic technique...
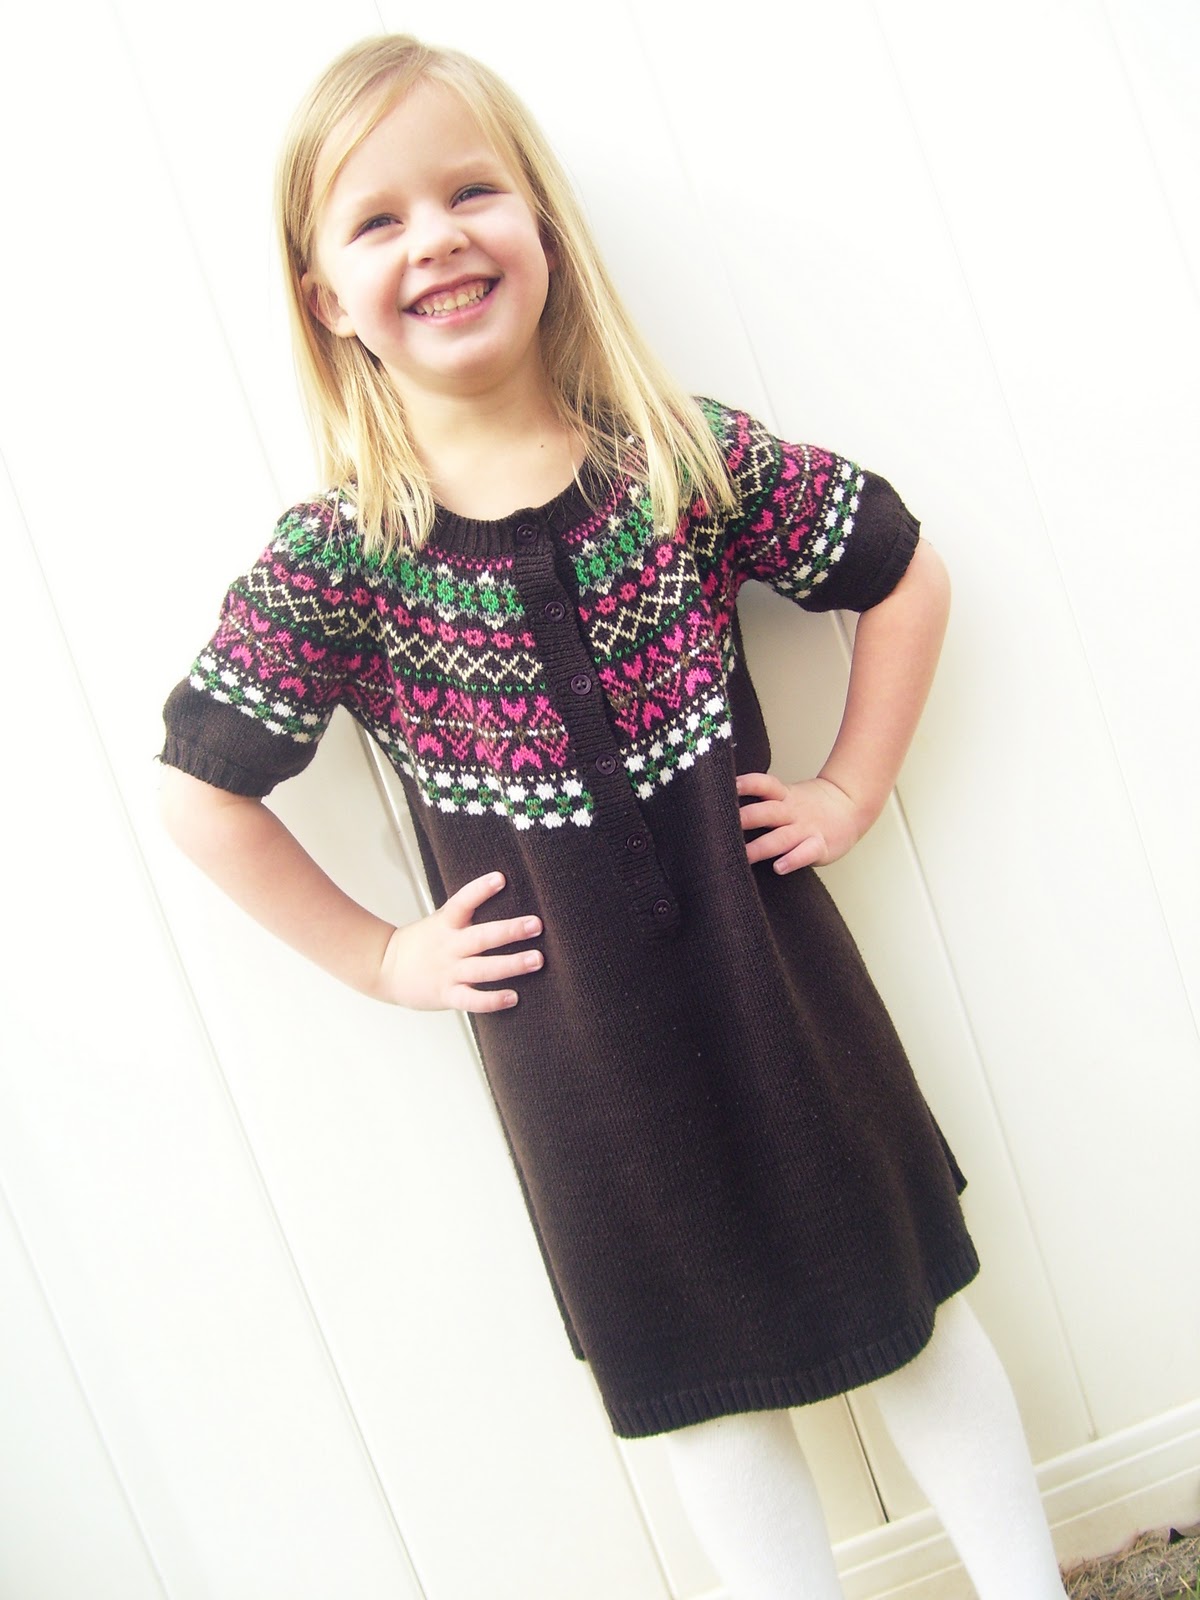
Alright. So, I didn't take a before picture of this sweater. I know! So so so not cool. I cruised around the internet trying to find something comparable.
Although you can see that the one above has a row of buttons on the front. And no hoodie. And, well, of course....it's brown. Ok. This is as good as I could fine. Moving on...
When I spotted it on the thrift store rack, it was love. I decided to make it into a dress for my wee girl. But I wasn't sure what to do about the big neckline which swamped her little shoulders.
Well, I started by taking it in on the sides and the sleeves all in one go. And also putting in a new seam along the shoulders from the neck to sleeve. (First I turned it inside out and then pinned it where I wanted the new seams....and... let's hope I first tried it on her to see where I wanted the new seams to go....but I can't really remember.... I actually made this last year and when I finished it, it was too big on her and looked funny. I chalked it up to a Craft Fail. But then Zoe found it a few days ago, slipped it on and I realized it fit and looked good! Yay!)
So, I serged it from the sleeves to the hem and also from the neck to sleeves (is this making any sense?) and tried it on her. (I probably had to take it in a bit more on the sides....)
And then I pondered about that neckline. What to do...what to do?
Hmmmm, what about some darts? Yes. darts. I put one in each side. The Nordic design disguises them rather nicely, I think.
This looks a bit like the outline of a body at a murder scene. Poor sweater....
Can you see the new seam line and dart?
No clue what a dart is? Or maybe you're picturing some yellow foam Nerf darts and wondering how I put those into the sweater dress? Well, let me help you out. Go check out this Dart Tutorial for more info.
This is a another pic of the new seam and dart, but from the inside.
(Alright, I'm moving some of my posts over from a previous blog that I abandoned....poor sad blog. This was originally published in November 2010)
I had never heard of bead buddies until a few years ago when my oldest came home and showed me a cute lizard he made at his friend's house. A new craft? Well, we just had to try that. Since then my boys have made many many bead buddies. This last weekend we printed out some new patterns and the boys got busy with this fun craft again...
Sam (above) was VERY proud of himself. This was the first time he made bead buddies (mostly) by himself. He made up his own pattern for the snake and corn.
(Some of those still need to be tied off or have the strings trimmed.)
Want to try making some with your monkeys? We get most of our patterns from the Making Friend Site. These are great gifts kids can make themselves. We usually put keychain rings on ours and the kids pop them onto their backpacks. But they could also be ornaments (there are a lot of Christmas designs).
Tomorrow, while my sweet mom makes all the yummy food for Thanksgiving, I will be entetaining the horde of children with crafts. This will be one of them. Hopefully I'll keep them busy for...maybe 10-15 minutes? We can only dream.
ETA: Nope. The cousins didn't even try them last year. *sigh* Hmmmm....and I can't even remember what we did instead....maybe this year I'll trap all the kids at the craft table....Mwhahahahaha!


