Monday, May 23, 2011

Funday Monday: It takes a village...


Funday Monday Idea #6: Design your own paper bag village

Emmett was in charge of Family Night and he wanted to make a paper bag village.  He found the idea in a Family Fun Craft book.  I tried to find it on their site but couldn't.  But it's a pretty simple...you color lunch sacks (or a big paper sack cute down a bit like my fancy shmancy hotel up above) to look like buildings.  Then you take another bag, stuff with crumpled newspaper and then put your "building" sack around it.  Easy, right?

We had a great time designing our village.  The kids loved choosing a store or place to create...


 We have a toy store...


A grocery store topped by some colorful apartments...


A school...


A fire station, bakery (according to Zoe) and a book store...


A sporting goods store from my handsome cowboy (with a little help from Molly)...


And even a movie theatre.  Let's check out what's playing....


Oh, wow. Look at that! My books have been made into movies?!  Score!  heh heh.

The kids have big plans for this village.  Lego men will be visiting soon.  And after a bit, when they're tired of their town and have squeezed all the play out of it, they're planning on unleashing Molly-zilla on it.

I have got to see that.   


Linking up to...

Tip Junkie handmade projects

Funday Monday: Make a Summer List Poster

The summer slips by way too fast.  Before you know it it's the end of July and you barely done any of the fun things you wanted to!

Friday, May 20, 2011

The Friday Five: Chocolate Broccoli...bad idea?

#1: I bought a new cardigan yesterday for $4.38. Huzzah!


Not the most flattering shot.  And, oy! I need to clean that mirror!

#2: My kids love these things...


They're called Energy Balls.  Although we've started simply calling them Peanut Butter Balls.

Basically they are a cup of peanut butter, 1/2-1 cup of powdered dry milk (you mix in enough to make it a dough-like consistency) and 1/4-1/2 cup honey.  Mix up, roll into balls and refridgerate until they get firm.  You can roll them in cocout, chocolate chips, cocoa powder, etc. (before you refridgerate them) Or just leave them plain. And you can add dry fruit to them, too.  Yum!

#3:  I came up with a new craft idea this week.  Yay! I need to get it written up and sent off.  I really really like it.  A lot. If I run into you, I'll probably make you look at one of them.  Consider yourself warned.

#4: I have been staying up very late to work on Sam's Super Secret Birthday Project. Ack! I was trying to keep it simple. And it is...Not. At. All. Simple.  I don't think I'm going to get it done in time.  blech. I should have started sooner.

#5: I have to get my bum moving and get excercising again.  I just don't know when to fit it in! But I've got to find the time. I wish I had my own raquetball court out back.  I love raquetball.  I especially love playing with my husband and trying to beat him! I haven't done it very much.  When we were first learning how to play I managed to whoop him, but now he usually wins.  bah.   And I should probably stop eating so many peanut butter balls....*sigh* why can't carrots taste like peanut butter?  And broccoli like chocolate?

Thursday, May 19, 2011

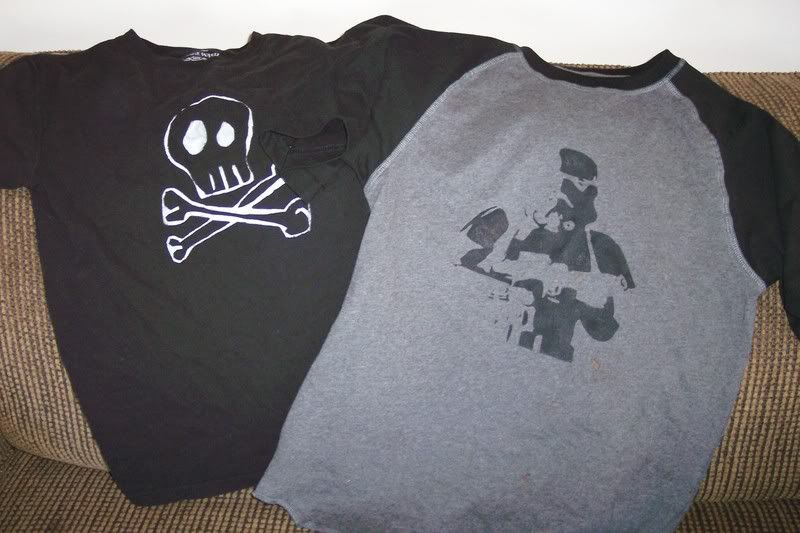
Thrifty Thursday: My Adventures in Stenciling

I wanted to make a little baby gift for a friend who had a sweet little boy about a week or so ago.  So, I bought a white onesie and a little pair of blue pants (each $2 at Wal-mart) and stenciled this...


This took me about 15 minutes (once I found the stencil and brush and paint...).  Fast and easy and cute! Yay!

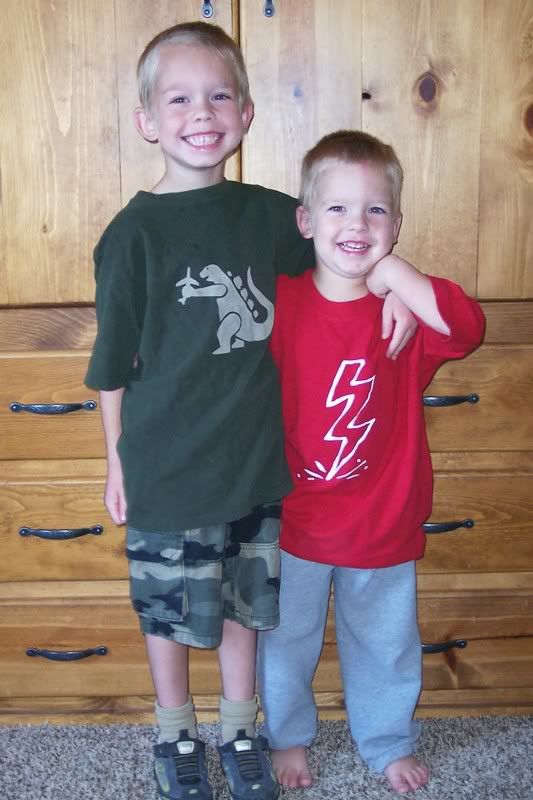
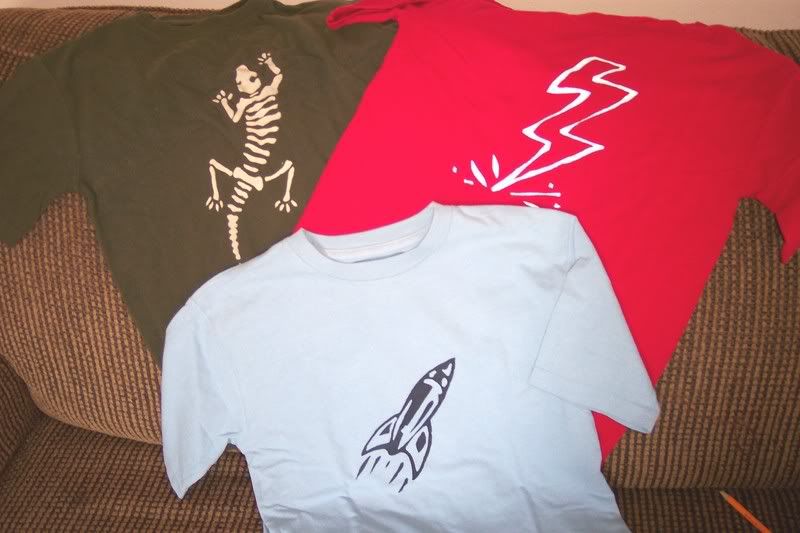
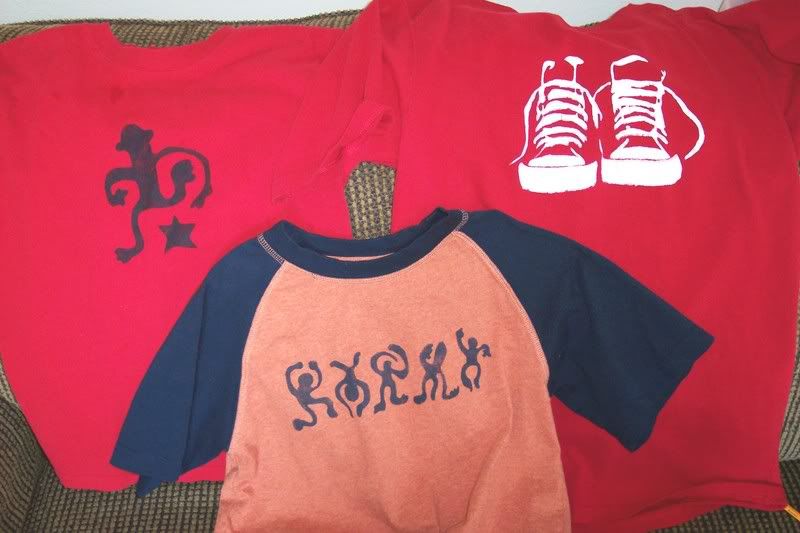
I love stenciling shirts for my kids and I've made loads over the years.  I originally posted a tutorial for how I go about making the stencils at Craftster in 2007.  But I'll repost it below...


Well, there are a lot of different methods for stenciling, so I'll just tell you what works for me....

I buy clear vinyl.  They sell it by the yard at wal-mart.  It's on big rolls at mine, near the red and white picnic vinyl.  I buy the thickest they have.  Then I print out my image.  I cut out a piece of vinyl a bit bigger than my image and I place it under it and trace the image with a fine point sharpie.  Then I tape it to a thin board (it was just some scrap stuff my husband gave me) and I cut it out.  I started out last year with just a plain ol' exacto knife.  But then I discovered the world of Hot Knives!  And, oh, they cut so nice!  I just bought mine in the craft section at wal-mart.  It was about $20 and totally worth it.  (Sorry I can't remember the brand and the exact name and it's in the basement in a box and I'm trying to type this while my baby falls asleep in her sling....)  It plugs in and came with all sorts of attatchments for wood burning, fabric embossing, etc.  And it came with a stencil cutter, but I found I didn't really like that--it does something weird to the vinyl.  I just like the exacto knife-looking one. 

So, anyway, I cut it out, remembering to add bridges to the design if there weren't any in the orginal.  Does everyone know what bridges are?  Hmmmmm.....well, they are....urgh.  I'm not sure how to explain this....

Alright, this site kind of explains bridges...
http://www.iratethis.com/t-shirtblog/2007/08/how-to-stencil-your-own-homemade-t-shirt

You just have to put the bridges in to keep some of the areas not painted. 

So, then, after it's cut out, I place some cardboard between the shirt, under the area I'm going to stencil.  Then I tape the stencil in place.  I use a stenciling brush (is that what they are called?  It's one of those brushes with really hard bristles....) and apply just your regular everyday acrylic craft paint (remember to blot the brush on some paper towel after dipping in the paint--if you go straight from paint to shirt, the paint will bleed under the stencil and this is not pretty).  I probably should use fabric paint, but so far, I haven't had any problems with the craft paint.  I did robot shirts for my boys last year and they've been washed a gazillion times and the robot is still dancing on the front.

Alright,ANYWAYS (I feel like I get sidetracked quite easy...) after I paint it then I remove the stencil and use a small itty bitty brush to carefully fill in the bridges and fix any mistakes that may have mysteriously shown up (heh.  Yeah, I seem to make a mistake...at least a small one with each one!) I let it dry and then I put a thin piece of fabric or paper towel over it and iron it really good.  Now, my point of this is to set the paint and make it stay.  But I haven't ever stenciled anything and NOT ironed it.....so, I'm not so sure this is needed.  I mean, it works for me and I think it makes the paint stay better...but maybe it would stay just as good without ironing?   Ah well, it's not hard and I don't want to chance it. 

So, anyways (again) I then show my boys and listen to them rave about how cool it is (that is the best part!  Hmmmm, I don't look forward to the day when I'm no longer so awesome in their eyes!!)

And that's it.  I know some people use paper or cardboard for their stencils, but I like to reuse mine over and over.  I hate to waste time on something I can only do once. 

I sure hope this helped and made sense.

Good luck and if you all have more questions, feel free to holler!  Cheesy
(I just thought of another tip.....if you make a minor mistake when cutting out your stencil, just put a couple layers of clear tape over the boo boo and recut it.)


*******************************************************************************

Now who is going to start stencling?  Hmmm? Huh?  Come ON! It's way fun. Give it a shot! You can create unique and fun t-shirts for your kids. Or for yourself. Or for your husband! (I made a shirt for my handsome cowboy that says, "Never trust a man with a mustache." Yep. He has a mustache.)

Wednesday, May 18, 2011

Write On Wednesday: There once was a man from Nantucket...

A couple years ago my mom told me about a writer she heard talking on a morning show about how she liked to write poems about her every day life, about her children and daily things.  My mom encouraged me to give it a shot. 

That day I wrote this...

No Me!
By Erin Shakespear

As I try to pull her purple shirt
Over her sweet head,
“No me!” she cries.
And she shoves her arm
Into her sleeve. 

As I try to pull her tights and skirt
Up her little legs,
“No me!” she cries.
And she struggles to haul them
Up and over her bum.

As I try to put Mary Janes on her
Wee chubby feet,
“No me!” she cries.
And she finally gets them on
With the toes pointed out.

Later, as I try to put the kids to bed
Her dad says, “I’ll rock her.”
 “No me!” I cry.
And with a blanket and a book I snuggle
With my favorite girl.


I can't read that without getting a bit teary-eyed. I think Zoe was around two then.  And it captures her sweet little independent spirit perfectly. 

We like to have our own annual Shakespear Talent Show.  We video tape it and then watch it while eating a yummy treat.  It's great fun. And I'm always so impressed with what my amazing children and handsome cowboy come up with.  Did you know my he can stand on his head? And whittle a whistle? Um...not at the same time though....

One year, I decided to write some limericks about my family for my talent.  Now. I'm not the best poet. And I think I cobbled these together the day of the talent show.  Maybe I started the day before.... (there isn't one about Molly because she wasn't with us yet)...

There once was a boy named Weston.
Who always had a question.
He asked night and day
How? When? and May?
Then with tape we taught him a lesson.

There was a young boy with a smile
Who caused trouble all of the while
He teased and he tricked
He flapped and he flicked
And all the while he smiled that smile.

There once was a boy named Sam.
Who giggled and laughed and ran.
But sometimes he cried
And his family sighed
Then they stuffed their ears with ham.

There once was a girl who was loved
She was often as sweet as a dove.
But then she would scream
It was quite obscene
She’d even be mean
Was she letting off steam?
She was oh so extreme
She’d create a big scene!
We’re so glad she was sent from above!

There once was a man with a moustache
Who liked saving his cash
For he often forgot
Just how much he’d bought
Then he’d buy more guns for his stash.

There once was a woman from Cedar
You could hear her before you could see her
For her laugh was so loud
She drew quite a crowd
To a muzzle they did treat her.

So, what is my point in sharing these silly poems?  It's probably pretty obvious.

Don't wait for the grand and brilliant moments to pick up your pen and write. Or maybe my point should be that sometimes the simple things *are* the grand and brilliant moments. And you should write about them. Write a poem. Write a song.  Write a list! Just write. 

And speaking of writing a song, I made this one up about our wee Molly the other day (after listening to Skippy Jon Jones, Lost in Spice too many times)...

(sung to the tune of The Mexican Hat Dance)
Oh! We love our Molly Tamale! *clap clap*
She is our one and only *clap clap* (yes I'm aware this doesn't really rhyme...but you can make it work!)
Sweet dolly, our Molly, so jolly *clap clap*
Oh! We love our Molly Tamale! *clap clap*

*************************************

Alright, writing goals.  blech. Nope. I didn't reach mine from last week. I did think about my story A LOT. I worked on some different ideas in my head and I realized I needed another Aha! moment at the end of the book and I'm vaguely aware of what it is.  I like it when you think you've learned all the surprised in a story only to learn there is more. 

I'm meeting with my Pub Club next Tuesday, so I better get some writing done this week.  I need to polish up ten pages.  Hmmmm, what ten pages? What scene? Something new? Probably not.  I'll try give a spit and shine to a scene I've already written.  Lana has requested the British dragon scene.  Maybe.  I'll have to see where my muse takes me (don't I sound so writerly? Mmmm, no? Picture me in something tweedy...or maybe with a colorful silky scarf?  Maybe that will help.)

Tuesday, May 17, 2011

How-To {Tuesday} Give Your Children Superpowers

Zoe was invited to a cute little superhero birthday party on Saturday and I thought it would be fun to whip up some fun superhero masks for the birthday boy. 

These were so easy.  No! Really, they were (friends are always giving me a hard time about saying everything is *so easy*)

I found the templates at Homespun Treasures (as well as a whole ton of other awesome tutes). I've made masks for Halloween before so I was familiar with the technique but I gave the instructions a quick glance over.

I decided to make mine a little different.  I used knit so I wouldn't have to do the satin stitch around the edge and...erm...well, that's pretty much all that was different I guess!

So, first off, I printed out patterns.  I adjusted the shape of two of them, making them bigger and giving the one more of a cat eye look.


Then I traced patterns onto the non-shiny side of really thick interfacing.

I fused this with the iron to the wrong side of my fabric, using a scrap of fabric between the iron and interfacing.


Following my traced lines, I cut the masks out. And then cut the eye holes out, too.


Then I ironed the other side to another piece (wrong side) of fabric. I hadn't bought double sided interfacing(at least I don't think it was...), but I noticed when I ironed them the first time, the interfacing kind of stuck to the scrap cloth I'd placed between the interfacing and the iron.  It peeled off easily but I thought this would be easier then trying to just pin the layers together and it was.  So much easier.


Next I trimmed this layer of knit down to the mask shape. 


Ack! Aren't they so cool?!  I love them. I wonder if wearing a superhero mask would go with my own style? Hmmm, would that look odd?  Me, walking the aisles of Wal-mart sporting a pink mask? Maybe I'd be able to get through the place Super fast. heh heh.

Ok, so then I measured how much elastic I needed by having one of my sons hold the mask up to his face. I peeled back the stuck, but not really stuck side of fabric where the elastic needed to go and slipped the ends of the elastic into the sandwich on each side of the mask.

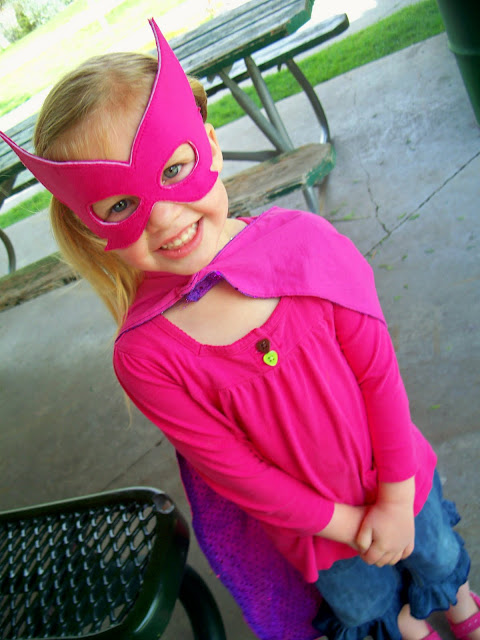
And then all that was left to do was to stitch around the edge of the whole mask, including the eyeholes, trim the thread, wrap them up and slip the pink one on my sweet little superhero. 

I was in a hurry to get the party and forgot to take some pics of the other masks! Snap.


This was such a fun and easy (and cheap!) birthday gift! I need to whip up some more of these masks to go in our dress up box.  I think we need one in every color! And, of course, one for myself.

I think I'm need a purple one.  Maybe with yellow lightening bolts on the side. 

Monday, May 16, 2011

Funday Monday: Take a Rock Walk

We had the missionaries over for dinner last night (I belong to this church) and my husband got to be their chauffeur for the evening so the rest of us decided we needed something fun to do.  We talked over our options and decided to do a craft. 

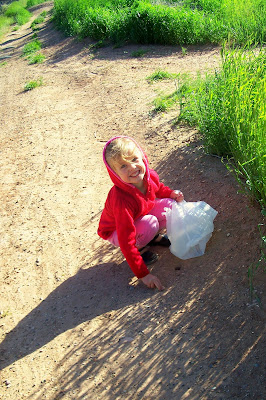
So, we gathered up some plastic bags, walked to a big empty lot nearby criss crossed with bike paths and collected a bunch of rocks. 


Zoe had a great time filling her bag.  She said, "Here is a little one! And another little one! And another little one!" Yep.  She likes little things. 


But even little rocks start to get heavy after awhile.  And they can make a hole in your bag when you get too many!


We had great fun chatting and laughing.  The boys pretended to ride imaginary bikes on the bike paths.  heh heh. I have the funniest kids. 

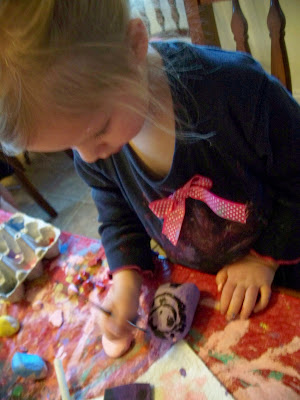
Back at home we pulled out our crafting tablecloth, grabbed a bunch of paint and brushes, unloaded our rocks on the table and set to work. 

Think we have enough rocks? Hmmmmm, I don't know...
Sam made a turtle who has become his little pet. And a ghost and an ice cream cone and an egg. 


Emmett made a chair and table and also his name.


Zoe made a lot of little faces. 


Weston started on a field full of a herd of cows.


I made some wee cute strawberries (snagged the idea from google images). 

We put the rocks together with a hot glue gun, but it doesn't work very well.  I'm going to try using E6000 glue.  I have some of it...somewhere.  I might have to face The Pit of Despair (otherwise known as my craft room) to find it.

Sam's turtle got hungry....

Thursday, May 12, 2011

Thrifty Thursday: Boring Jeans to Ruffley Capris (a $2 project!)

Boy, have I got a thing for ruffles lately.  But can you blame me? They are so cute! And they get even cuter when you start out with cheapo jeans from the thrift store....

I picked these up for my 3 yo Zoe at D.I. for about two or three dollars a few weeks ago. I think they were only $2.

I had Zoe try them on last night and I figured out where I wanted to chop them.  Then I let her get back into her jammies and after I got my last and smallest monkey popped into bed, I cut the legs off the jeans and sliced open the leftover bits. 


I cut these into strips to make the ruffles. I had enough to cut out two strips per leg. This made the ruffle twice the width of the pants.  (I ended cutting some other strips though...I didn't like how some of this denim had the vertical stripe thing going on.)


I serged these pieces together, serged the hem, ruffled them up, serged them to the bottom of the pants (sorry no in-process shots since it was super late and I needed to get them done so I could get some work done on Sam's Super Secret Birthday Project), ironed the ruffle down and top stitched them.


I couldn't wait for Zoe to try them on the next morning. 


Ok. Those are totally worth the late night sewing.  Totally. 

I'm linking to...

Tip Junkie handmade projects


Tuesday, May 10, 2011

How To Serve Octopus For Lunch

Mmmmm, octopus. Sounds yummy, right?

Well, it is when it's served like this...

A hot dog octopus, with mustard features swimming in a blue ramen sea.  Delish! Well, at least this cute girl thought so.  She especially enjoyed biting the octopus's head off.  Er....sweet girl, right?

As I was searching for Cinco de Mayo crafts and recipes last week I stumbled across this fun blog, Muffin Tin Mom...


I have never heard of muffin tin meals. They are a simple idea.  Basically you make a little meal in (usually) a six-cup muffin tin.  Some people make it even more fun by using bright colored and shaped silicone muffin cups. This seems like a great idea, especially if you have a picky eater. On the Muffin Tin Mom's blog she also shows fun ways to present food sans muffin tin.

So, as I was rumaging around for lunch for my monkeys last week I remembered something I saw and thought I'd give it a shot...


Molly didn't take much time to enjoy the presentation though...


I used to do fun things with food for my oldest when he was younger. But these days managing to just feed all these monkeys, well, that's a major accomplishment! Alright, it's not that bad. Although sometimes it feels like it.

I'm going to try harder to be more fun though, to add more fun to my kid's days.  And lunch is a great time to do it!