Monday, March 21, 2011

Our Poet Tree

Product DetailsFor family night last week, we talked about the importance of being creative. I got the idea from reading a Fancy Nancy book. Yep, gotta love that little diva. At least, we do in our house.  It was the one called Poet Extraordinairre. 

Anyways, Fancy Nancy's class makes a Poet-Tree and writes poems on the leaves for their tree.  What a great idea, right? And since I like any excuse to encourage creavity in my family, we made our own!


Here are some of the kid's poems...

Robots
By Sam

I like robots.
They are cool.
I wish I had one of my oen.

The Bus
By Weston

Once I went onto the bus.
I sat by a kid.
His name was Gus.
It turned out he was a squid.

It's Spring
By Emmett

It's spring it's spring
come out little flowers.
Come out little leaf's.
come out little fruit.
come out little bushes.
come out little rose bushes.
Come It's spring. It's spring.
Now let's go outside to play on the swings
and the playground.

Unnamed
By Zoe

Poets are red.
And poets are pee.
We are fun.
And we love each other
Twinkle little star.

(I'm not sure Zoe totally got the concept of a poem... :)

We also watched this brilliant and beautiful video about the importance of creativity. It's made by The Church of Jesus Christ of Latter-Day Saints, but I think the message speaks to all faiths. It is lovely and moving.


all crafts Homemade Projects ~ Add Yours!


Tuesday, March 15, 2011

My Preschool Turn--Bears!

Today was my turn to teach the little mom-run preschool group I'm a part of.  I love teaching these little ones! They are so fun! And we were having such a good time that I didn't get many pictures taken. 

The theme for the month is Fairy Tales and since there are five girls but one boy I didn't want to do anything too over the top princessy. So, I chose Goldilocks and the Three Bears for a theme. And it's kind of odd that it's considered a fairy tale, right?

I asked the moms to have their child bring a teddy bear with them and while we waited for the last little girl to show up, I turned on the song Pots and Pans on the CD Dog Train (anyone else in love with Sandra Boynton's CDs?) so they could dance with their bears. We boogied for a bit and then we sat down and we lined the bears up in relation to their size.

Next I told them the story of Goldilocks with their help. Then we read the book Dusty Locks and the Three Bears, a cute western retelling of the story. Then it was time for some free play time.


I had gotten out our box of play food and a couple registers and I encouraged them to make some food for their bears or play store. It's cute to hear them playing with each other and their sweet little conversations.

Then we made these fun peanut butter bear cookies together....(please ignore my stained pan :)


Peanut Butter Teddies
(recipe found Here)

Ingredients

  • 1 can (14 ounces) sweetened condensed milk
  • 1 cup creamy peanut butter
  • 1 teaspoon vanilla extract
  • 1 egg
  • 2 cups all-purpose flour
  • 2 teaspoons baking soda
  • 1/2 teaspoon salt
  • 72 miniature semisweet chocolate chips (about 2 teaspoons)

Directions

  • In a large bowl, beat the milk, peanut butter, vanilla and egg until smooth. Combine the flour, baking soda and salt; add to peanut butter mixture and mix well.
  • For each pear, shape the dough into one 1-in. ball, one 3/4-in. ball, six 1/2-in. balls and one 1/4-in. ball. On an ungreased baking sheet, slightly flatten the 1-in. ball to form the body. Place the 3/4-in. ball above body for head. For limbs, place four 1/2-in. balls next to the body.
  • For nose, place the 1/4-in. ball in the center of the heat. Add two chocolate chips for eyes and one chip for belly button. Bake at 350° for 6-8 minutes or until lightly browned. Cool on baking sheets. Yield: 2 dozen.
As these cooked I tried to teach the little ones step by step how to draw a teddy bear using circles. This was interesting. Some of them waited to follow the instructions. And some of them couldn't wait and jumped ahead. And some needed extra encouragement. They are so wonderfully different! I love it. 

Here's how mine and  Zoe's pictures ended up...


Then as we waited for our cookies to cool off we read another book, one of my favorites, We're Going on a Bear Hunt. We added actions as the family had to go Through everything and it was great fun.

Then it was time to munch up our cookies. There was much silliness and laughter as we talked about eating their ears and heads and bellies.

We also talked about the differences between real bears and bears in the story (for example real bears do not wear boots or live in a cabin). And we did the little Teddy Bear, Teddy Bear rhyme....

Teddy Bear Teddy Bear turn around
Teddy Bear Teddy Bear touch the ground
Teddy Bear Teddy Bear climb the stairs
Teddy Bear Teddy Bear say your prayers
Teddy Bear Teddy Bear turn out the light
Teddy Bear Teddy Bear say good night!

I have such a great time with these little ones and I'm grateful Zoe and I are a part of this preschool group. I debated whether I'd have time for it this year. I'm always being pulled in a hundred different directions and I often just want to say NO when new opportunties come up. But I'm really really happy we've done this. I've loved watching Zoe interact with the other kids. Not to mention that I also get a few hours mostly to myself every week when it's not my turn (I have the wee baby with me, of course, but she doesn't talk, yet, so I get some quiet time!)

Monday, March 14, 2011

like mother like daughter...

The wee girl already has a thing for books. Such a smart little sweet pea.


But bad form, Molly. No peeking at the end!


What no time for a smile? Are you a bit busy or something?

Friday, March 4, 2011

Upcycled Tea Tray Tutorial

Oh, how my wee Zoe loves her tea set. We have countless tea parties where we pretend to sip cup after cup of hot cocoa.

And when her tea set is all set up on her pink table, she even manages to convince her older brothers to stop for a spell and have a cup of hot cocoa with her.

So, when I came across this tray I knew it was destined to become part of our tea party fun.


First we roughed it up a bit with some sand paper. Then we painted the side pieces of the tray.   I let Zoe pick the color. Of course, she chose...


Pink. This girl would live in a Pink World if she could manage it.

Since we were planning on covering up the bland paper in the bottom, it didn't matter if Zoe wasn't the most accurate painter. It would be much much easier to use spray paint on this project (for some of the reasons why spray paint is totally awesome, check out this fun post by my friend Sundi) but I opted for just the regular ol' acrylic craft paint. Because #1: It let Zoe be involved and #2: I didn't have any hot pink spray paint on hand. We used that all up on her little tea table.

I had some fun scrapbook paper for the tray down in my Pit of Despair (otherwise known as my sewing room/office) so I measured the tray, cut the paper to size and we spread some Modge Podge on the bottom of the tray and slapped it down, spreading it out all nice and neat. 

But the tray is wider than twelve inches, so we also had to add a border of a coordinating paper. Then we covered it all with another layer of modge podge. 


Then I lightly sanded the corners and edges of the tray, roughing it up a bit. Ryan sealed it with a clear coat spray (which I could have done myself, but he's just nice like that) and after it dried it was ready to play with!


You can't see her sparkley cape so good in this picture. 


She is also sporting a very nice cat mask. Yep, not just everyone gets to have a tea party with Super Kitty Cat and her doll, Pinky. :)

Saturday, February 19, 2011

Glitter Playdough (including The Best Playdough Recipe Ever!)

For many long and arduous years I have searched for the best playdough recipe. Not too dry. Not too sticky. Not too difficult to make.  

And finally, yes, finally my quest is complete.  I have found it!  The Best Playdough Recipe Ever. Yes, that's right, The. Best. Playdough. Recipe. Ever.

I found the original recipe Here. But I tweaked it a bit. More flour, less oil, a substitution...

I tried making it with the cream of tartar....but I only had 1 1/2 tablespoons on hand. Ack! So, then I tried using Alum instead.  None. Left.  So....
I used cornstarch. Yes. Cornstarch (is there an echo in here?) And, voila!

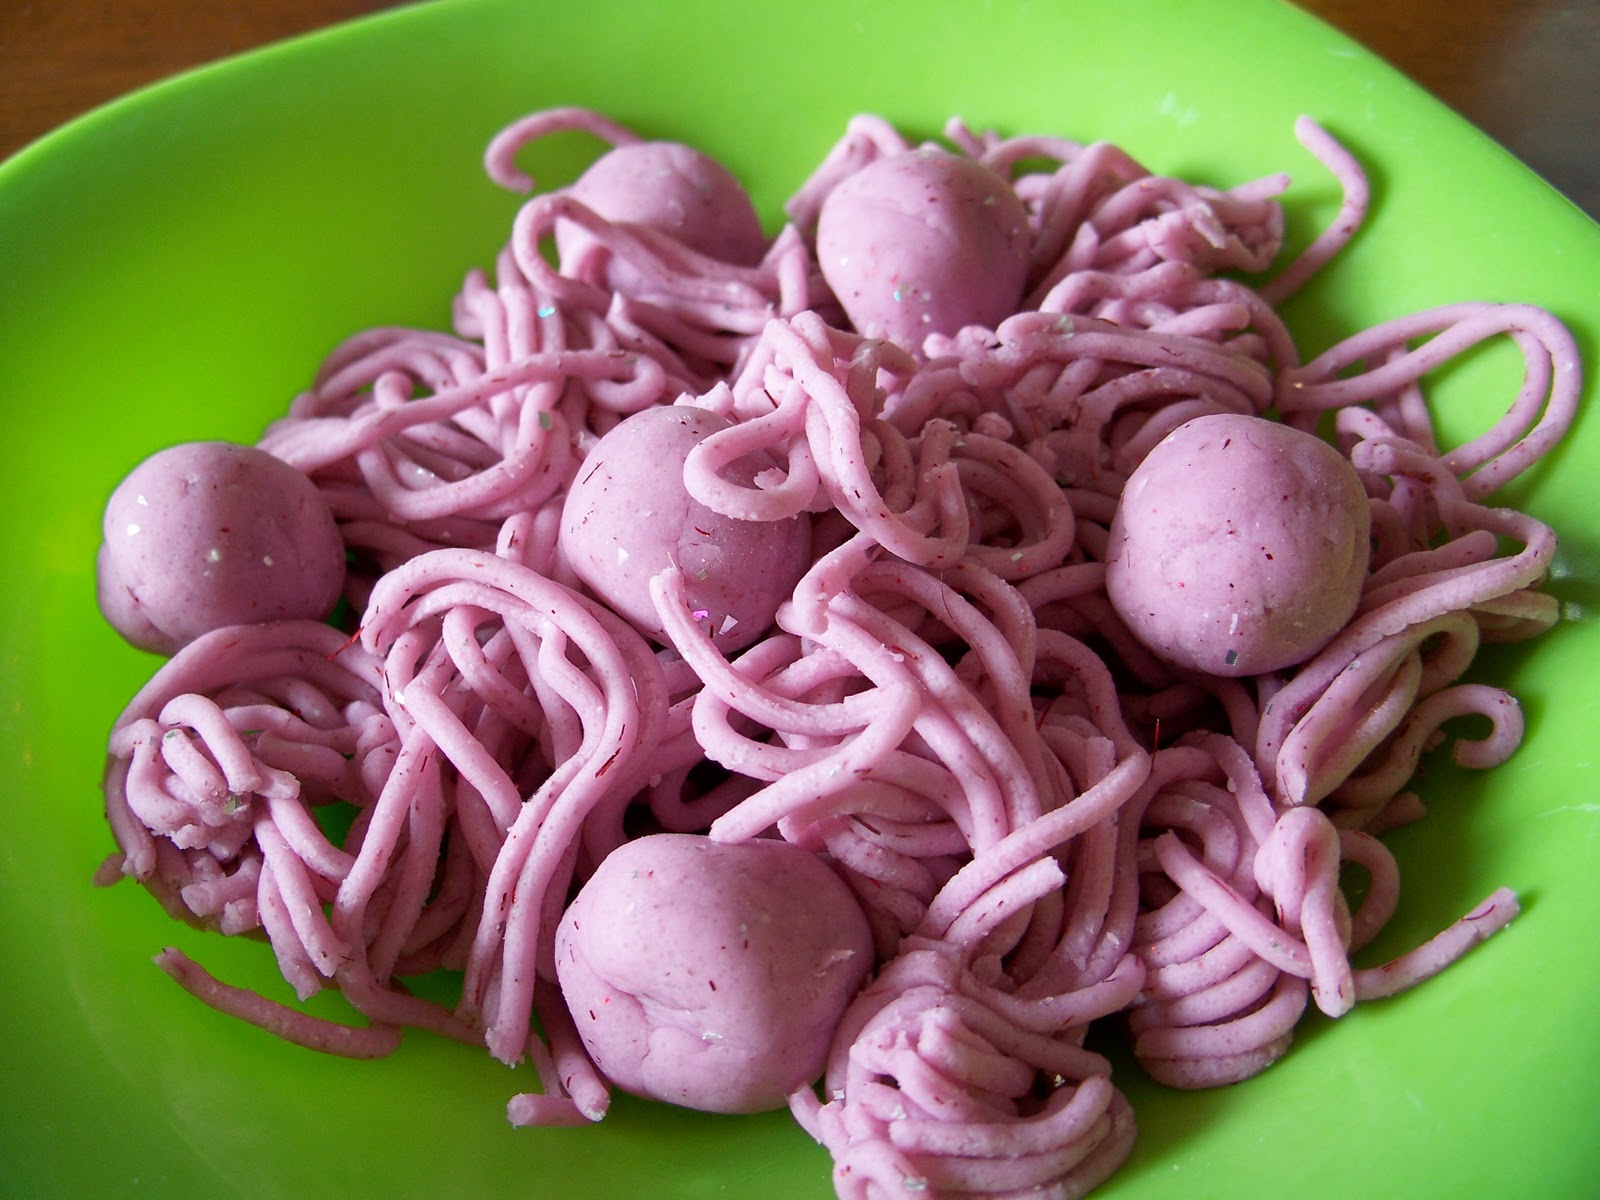
Oh, and what could make this playdough even better? Of course! Glitter.

The Best Playdough Ever

5 cups flour
8 tablespoons cornstarch
A whole bunch of glitter, if desired
2 cups salt
3 tablespoons oil
4 cups boiling water
food coloring

Stir together flour, cornstarch and salt. And throw the glitter in here if you'd like. Come on. Really you should. Glitter playdough? What's cooler than that?

Boil water and add oil and food coloring to it. Pour into flour mixture.  Stir and stir and stir and then when you can't stir anymore, knead and knead and knead. Then grab all your playdough toys and get busy. Oh, and you might want to gather up the little ones in the house, too.  No sense in you hogging all the fun for yourself.

Zoe had a great time making me many many birthday cakes. She sang me songs and made me blow out the candles.  If all those wishes come true, I should be published in no time.


Zoe's little friend, Elina came over and they had oodles of fun making things together. I love watching my kids interact with their friends. They're so cute together. As I type this, my boys are making a lego version of the TV show Wipe Out with a friend. So far they've had to ask for a bread pan, water and soap.  Apparently they need to make some "acid" to torture their lego men with, too..  Sweet boys, right? 


Elina enjoyed making little gingerbread men "cookies". Hmmmm, it doesn't look like Zoe was interested in eating any though. 


The next day Zoe and I played playdough chef and made pizza....


spaghetti...


and a hamburger and fries...


Even Molly got in on the fun.

 I gave her some playdough in a plastic baggie. But she wasn't very interested in  it. She wanted the real deal.  Problem was that she kept trying to eat it.  Or throw it. And it's funny that she had to keep tasting it and then spitting it out.  How's that short term memory baby?


Thursday, February 17, 2011

Baby Sling Tutorial Link

I love baby slings.  I've carried all our little ones in them, except our first.  I hadn't discovered the wonderful world of baby-wearing, yet. But I have to say...I think I'd had to have stopped having kids if I didn't have baby slings.

I wear my baby at church, trudging around wal-mart, going for walks, as I whip up dinner, while volunteering at the school, perusing books at the library, dancing around the house or scouting for a Christmas tree as I'm doing in the pic.

So many people ask me about the slings I have.  Whether I made them or sell them or where I bought them. I bought my first one when Emmett was tiny. It is a padded ring sling called a NoJo. I enjoyed it at the time, but have since moved onto the pouch slings, which I do make. The NoJo was a bit bulky and I like that a pouch sling can be folded up and put in my bag for when I'm not using it.


The tutorial I use can be found Here. There are even directions on the site for making a child-size sling. I made one for Zoe when Molly was new.  She needed to pack her baby dolls around like her mom. :)

I make the reversible sling but with the same fabrics on both side. I made three of them before Molly came along (I needed options!) and luckily she loves to be packed around in it as much as her older sister and brothers did. They are super easy to make. Really. They are. Straight lines. One simple curvy line. So easy. 

I'm not sure how other people manage to go anywhere with a baby without a sling.  I guess they pack their wee one around in that heavy car seat?  I have too many kids and not enough hands for that method!

Tuesday, February 8, 2011

Host a Bow Boot Camp Party

Last week I hosted a fun hair bow/flower-making party.  We each (well...almost everyone. The slackers know who they are... :) demonstrated a flower technique.  There was such a great variety!  I loved seeing everyone getting down with their crafty selves.
Sundi and Sarah looking cute and crafty! :)
I didn't take a lot of pictures of the bows people made that night.  The lighting wasn't too good and I can't figure out how to take good close-ups with my camera in poor lighting.  Bah. I need to find the manual for it.  I was hoping to get some made after the party and take pictures (I was too busy visiting and snacking during it to make many...I only made one and I didn't even finish it!) but I've been too busy with my writing.  Oh, how I love to wait until the last minute to do things! Blech.
Jessica looking very serious about her bow project.
Kendra looking...
seriously happy! :)

Kendra showed us these super cute flowers that look like they are much harder than they actually are! And by the way, Kendra wins the award for getting me her link for her flower the fastest.  Thank you Kendra!! :)

Allison tried her hand at making a sweet satin rose that I've never seen before.  And it turned out really really pretty!

Seanie, my cute neighbor, showed us how to do a fun fabric flower....I can't find a tutorial for it on-line though. I'll keep looking...

Here's cute Allison and I.
I made this pic black and white because I had
a yucky rash on my neck and it's harder to tell like this! 
Ugh.  I couldn't figure out why my neck looked like
I had the plague. But now...I'm thinking
 I'm allergic to my moisturizer. 
Or maybe....it is simply the plague.
 Better keep back.

Jessica showed some really sweet flower clips made by singing the edges of satin.  Sundi demonstrated how to burn the edges. This is such a super easy technique with such fun results. It's a bit addicting!

Mikki (my super cute sis-in-law who I love and adore and who I wish I'd snapped a picture of before she had to run off to do homework :) showed how to make cute itty bitty fluffy flowers.


Heather and Cassidy working as a team on their crafts!


Shanna, Heather and Cassidy shared a bunch of clips they've been making.  They are like the rolled rosettes you see everywhere, but they tried making them with ribbons.  Oy!  I wish I'd taken more pictures!  They are really really cute.  Snap.

*Edited to add* Yay! Shanna sent me a picture of her clips! 
These are so sweet, right? It looks like she rolled the ribbon with pearls that you can buy by the yard (I've gotten them from Wal-mart). I love 'em.  I wouldn't have thought of useign the pearls like this. 


Kathy, a self-proclaimed non-crafty girl, showed how us how to make a cute (I think I need to find a new word for cute...I'm using it quite a bit in this post!) ribbon flower. I keep trying to suck her into the crafty world and so far I'm doing pretty good.  Skirts, a quilt, a tulle tu-tu and now hair clips!  Kathy, I'll convert you to the crafty-life yet. :)
 Kathy with her cute ribbon clip,
Shanna and wee Emmett. 
Kayli showed how to make a fun gathered flower. It was a really great simple idea that would be fun in all sorts of different fabrics.  Hmmm, I've tried searching for a tutorial on-line for it, too.  I'll have to keep looking.

 Mindy showed us a neat layered ribbon flower.  Lots of fun possibilities with it.  Snap. I tried to find a tutorial for it, but couldn't.


It was interesting how one idea seemed to show up in quite a few different ways.  I demonstrated how to make these flower puffs....


To make these you cut out about 8 round flower shapes, pick at them to make them fray, fold them in half and then in half again and then string them onto thread like garland.  Then once you have them all on the thread you loop it around to the first one and take a stitch, pulling it tight.  Then you fluff them up and attach to clips.  I will try to find time to put together a better tutorial than that brief explanation!


Sundi getting busy with a glue gun
and some fabric.
 

I love how they turned out!  The flower Mikki shared was similar, Allison brought one she had made that was basically the same idea (without the fraying) and Sundi....well, she showed how to make a clip like this but soooo much easier.  With glue!  I love it. 

Basically she cut out four big round flower shapes and four small ones.  Then she glued them all together and...Voila! So easy and cute. (hmmm....that explanation was somewhat lacking, eh?)She said she's going to make a little video tute.  And, thus, the anticipated waiting begins. I'll let you know when she puts together the theatrical masterpiece. (no pressure Sundi :)

Funny that four of us did something so similar, right?


As I was scouring the net for flower tutorials, I found some fun ones I'd like to try... 
T-shirt knit flower pom poms (I've got to try these.)


Scrappy Strip Rose (ok. This is seriously a really awesome flower.)

Folded Flower with a Covered Button

Felt Flower Ball (I love it with the little leaves. So cute.)

Another Felt Flower


And if you're looking for bow tutorials, I found a bunch here...

Boutique Hair Clips