Showing posts with label tutorial links. Show all posts

Thursday, December 15, 2011

For My Molly Monkey

I am running out of time to get all the projects done and the ribbons tied and the last few things bought! But at least I got this adorable bit of cute all done....


I can't wait to give her to my little Molly Monkey. Don't you just love those shoes?! 

I love this pattern. This was seriously one of the easiest stuffies I've made. To make your own, check out the tutorial and pattern at MmmCrafts. And that is one smart chickadee over there. After making this monkey, I want to buy some of her patterns and whip out some more (check out her cute Little Red Ridinghood....so stinkin' cute.)

Sunday, November 20, 2011

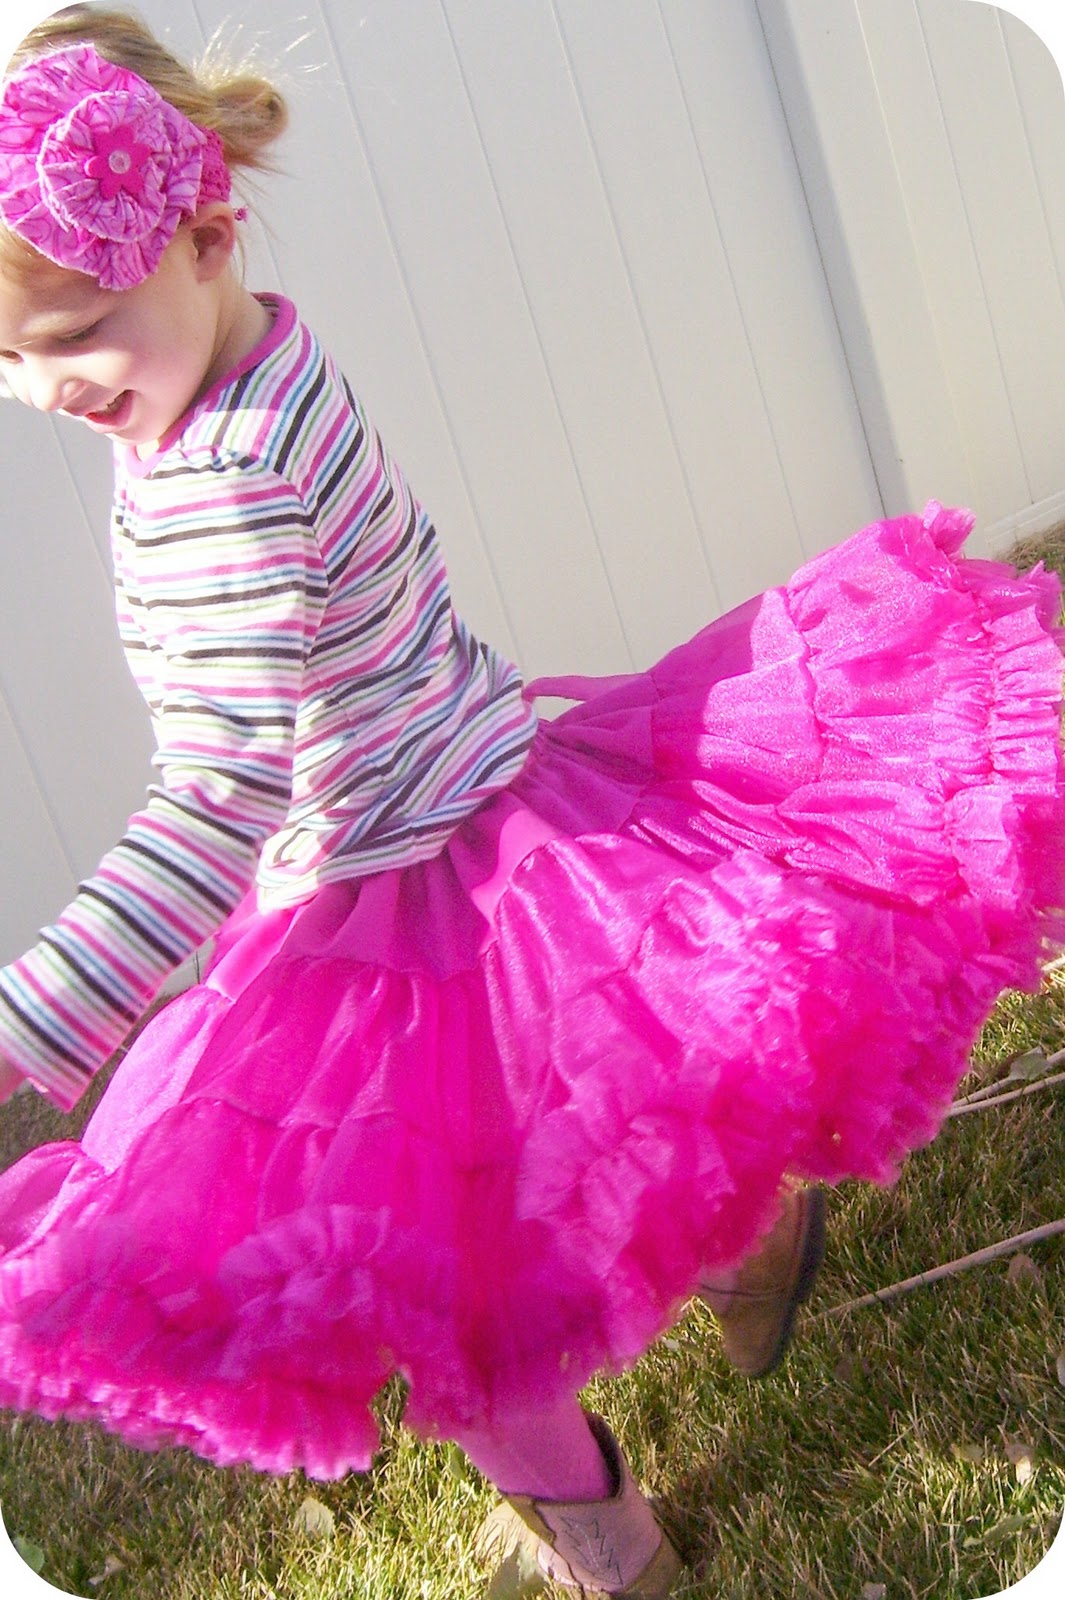
Fluffy Ruffly Pettiskirt


Pink and ruffly and twirly and So. Much. Fun. Yep, that describes this skirt perfectly.

I made this skirt for Zoe about a year and half ago.....


Oh! Look at her. She's so small! I found the tutorial for this fabulous fluffy skirt at Made by Bronwyn. And while it did take a fair amount of time ruffly all that wonderful chiffon fabric, it was pretty easy. And so worth it.

Wouldn't this make such a fun Christmas gift for a little girly girl?

It's so cute watching Zoe wear this skirt.


She can't help swishing around as she walks.


And, of course, it's great for twirling.


I had to include this last shot.


Do you think this pose will catch on with other models?

Tuesday, May 17, 2011

How-To {Tuesday} Give Your Children Superpowers

Zoe was invited to a cute little superhero birthday party on Saturday and I thought it would be fun to whip up some fun superhero masks for the birthday boy. 

These were so easy.  No! Really, they were (friends are always giving me a hard time about saying everything is *so easy*)

I found the templates at Homespun Treasures (as well as a whole ton of other awesome tutes). I've made masks for Halloween before so I was familiar with the technique but I gave the instructions a quick glance over.

I decided to make mine a little different.  I used knit so I wouldn't have to do the satin stitch around the edge and...erm...well, that's pretty much all that was different I guess!

So, first off, I printed out patterns.  I adjusted the shape of two of them, making them bigger and giving the one more of a cat eye look.


Then I traced patterns onto the non-shiny side of really thick interfacing.

I fused this with the iron to the wrong side of my fabric, using a scrap of fabric between the iron and interfacing.


Following my traced lines, I cut the masks out. And then cut the eye holes out, too.


Then I ironed the other side to another piece (wrong side) of fabric. I hadn't bought double sided interfacing(at least I don't think it was...), but I noticed when I ironed them the first time, the interfacing kind of stuck to the scrap cloth I'd placed between the interfacing and the iron.  It peeled off easily but I thought this would be easier then trying to just pin the layers together and it was.  So much easier.


Next I trimmed this layer of knit down to the mask shape. 


Ack! Aren't they so cool?!  I love them. I wonder if wearing a superhero mask would go with my own style? Hmmm, would that look odd?  Me, walking the aisles of Wal-mart sporting a pink mask? Maybe I'd be able to get through the place Super fast. heh heh.

Ok, so then I measured how much elastic I needed by having one of my sons hold the mask up to his face. I peeled back the stuck, but not really stuck side of fabric where the elastic needed to go and slipped the ends of the elastic into the sandwich on each side of the mask.

And then all that was left to do was to stitch around the edge of the whole mask, including the eyeholes, trim the thread, wrap them up and slip the pink one on my sweet little superhero. 

I was in a hurry to get the party and forgot to take some pics of the other masks! Snap.


This was such a fun and easy (and cheap!) birthday gift! I need to whip up some more of these masks to go in our dress up box.  I think we need one in every color! And, of course, one for myself.

I think I'm need a purple one.  Maybe with yellow lightening bolts on the side. 

Friday, May 6, 2011

The Friday Five: Random Fun

#1: I made this peanut butter chocolate cake a week or so ago. 


Yep. It was pretty darn good.  But I NEED to stop baking! Ack!

Oddly enough the recipe includes directions for a fluffy chocolate frosting but doesn't mention how much of the ingredients you need. So, I just used a chocolate frosting recipe from one of my cookbooks. 

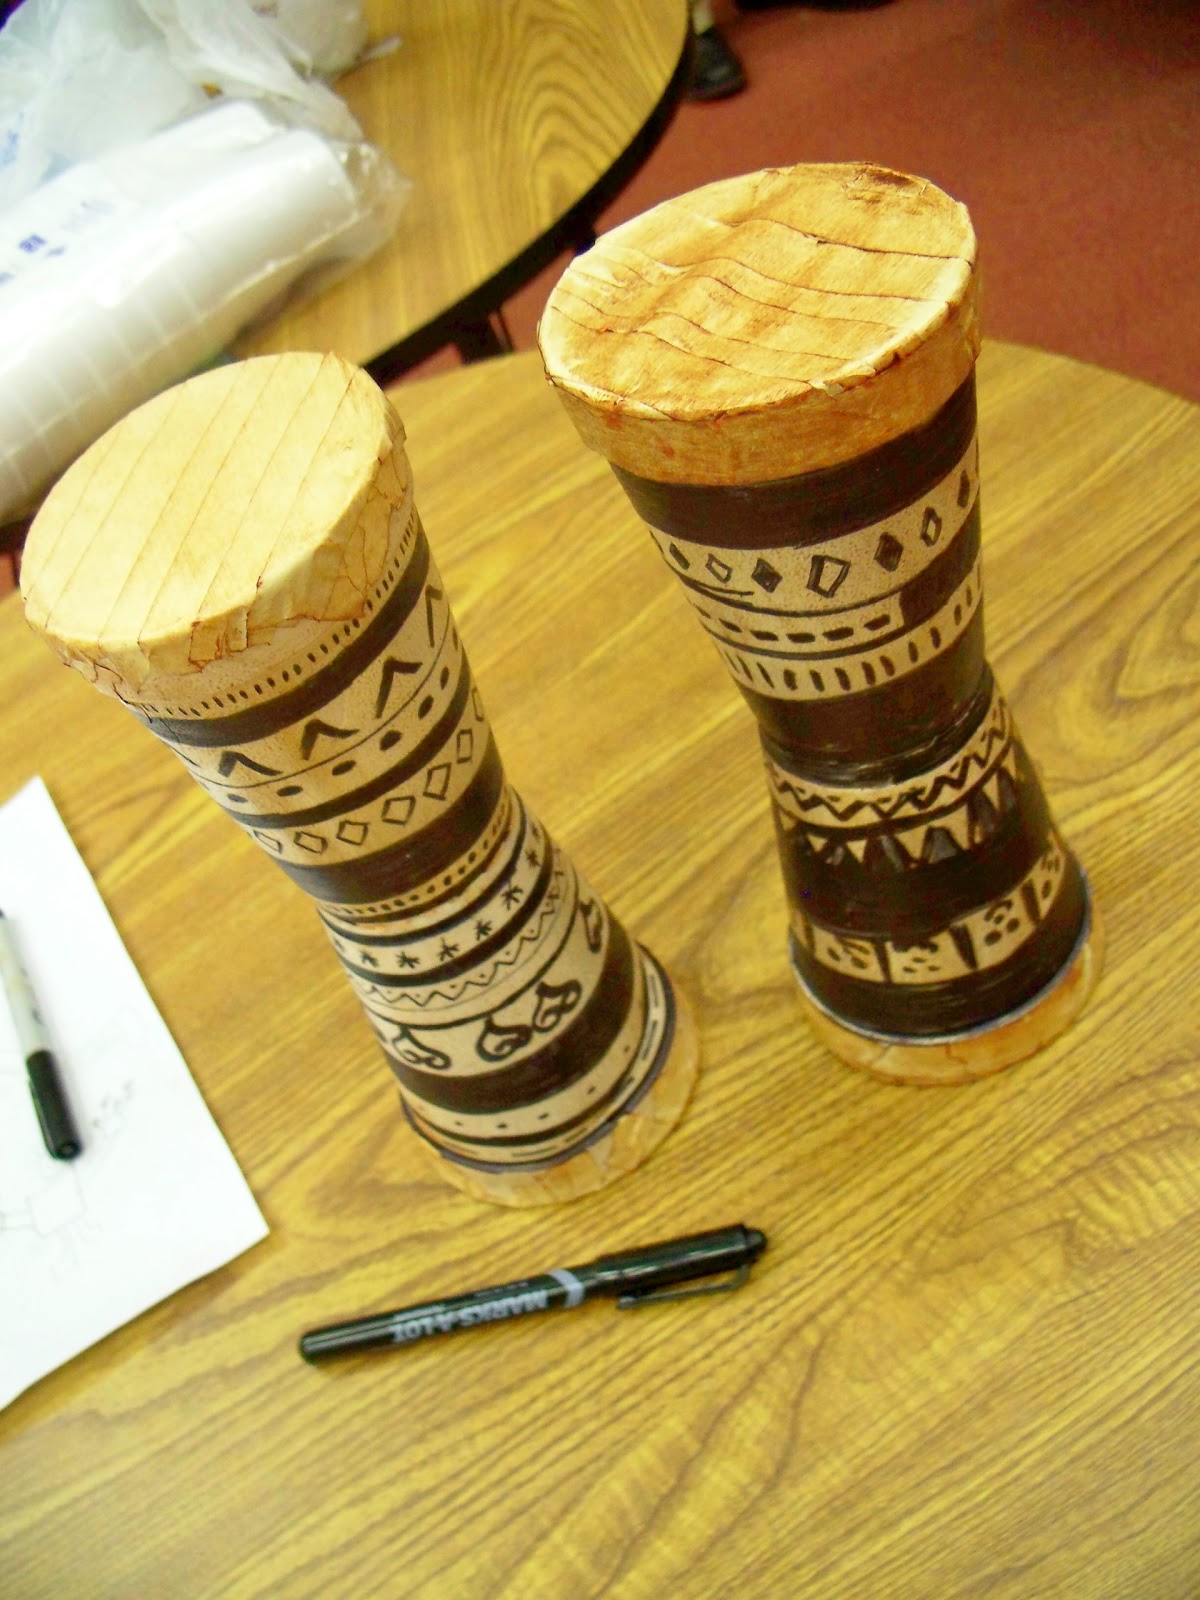
#2: We had our Cub Scout Pack Meeting last week and had an international theme.  The assistant Cubmaster found this fun craft for the kids to do, African Drums from styrofoam cups...


The kids loved making them.

#3: Erin, the assistant Cubmaster (yep. Both the Cubmaster and the assistant are named Erin...kind of funny)also made a really yummy Italian Lemon Ice.  It was deliciously tart.  I think we've found a new family favorite. 

#4: In honor of Cinco de Mayo, we had mexican food for dinner last night and even added a colorful centerpiece to our table.  I found the instructions for these fun tissue paper flowers Here.  The kids had a great time trying out different color combinations.  And even my 3 yo could make these.


Luckily I had some bright vases to put them in. 

 #5: Also...we made our own pinata!  It was so much fun. I used THESE directions. 


When it was all nice and dry, we painted glue on it and then stuck tissue paper scraps left over from the flowers. 


We love how it turned out!


We hadn't popped the balloon yet in that picture.  And I'll tell you what, that was probably the best part! The kids loved watching the balloon "disappear" when I poked it with a push pin. 

But sadly, we didn't smack the pinata yet.  My handsome cowboy had to work late. He was busy lighting fires (he works for the BLM and they were doing a controlled burn). And I didn't want him to miss the crazy good time with a blindfold, a bat and our homemade fun. http://erinshakespear.blogspot.com/2011/04/thrifty-thursday-funky-spray-painted.html

Thursday, February 17, 2011

Baby Sling Tutorial Link

I love baby slings.  I've carried all our little ones in them, except our first.  I hadn't discovered the wonderful world of baby-wearing, yet. But I have to say...I think I'd had to have stopped having kids if I didn't have baby slings.

I wear my baby at church, trudging around wal-mart, going for walks, as I whip up dinner, while volunteering at the school, perusing books at the library, dancing around the house or scouting for a Christmas tree as I'm doing in the pic.

So many people ask me about the slings I have.  Whether I made them or sell them or where I bought them. I bought my first one when Emmett was tiny. It is a padded ring sling called a NoJo. I enjoyed it at the time, but have since moved onto the pouch slings, which I do make. The NoJo was a bit bulky and I like that a pouch sling can be folded up and put in my bag for when I'm not using it.


The tutorial I use can be found Here. There are even directions on the site for making a child-size sling. I made one for Zoe when Molly was new.  She needed to pack her baby dolls around like her mom. :)

I make the reversible sling but with the same fabrics on both side. I made three of them before Molly came along (I needed options!) and luckily she loves to be packed around in it as much as her older sister and brothers did. They are super easy to make. Really. They are. Straight lines. One simple curvy line. So easy. 

I'm not sure how other people manage to go anywhere with a baby without a sling.  I guess they pack their wee one around in that heavy car seat?  I have too many kids and not enough hands for that method!

Tuesday, February 8, 2011

Host a Bow Boot Camp Party

Last week I hosted a fun hair bow/flower-making party.  We each (well...almost everyone. The slackers know who they are... :) demonstrated a flower technique.  There was such a great variety!  I loved seeing everyone getting down with their crafty selves.
Sundi and Sarah looking cute and crafty! :)
I didn't take a lot of pictures of the bows people made that night.  The lighting wasn't too good and I can't figure out how to take good close-ups with my camera in poor lighting.  Bah. I need to find the manual for it.  I was hoping to get some made after the party and take pictures (I was too busy visiting and snacking during it to make many...I only made one and I didn't even finish it!) but I've been too busy with my writing.  Oh, how I love to wait until the last minute to do things! Blech.
Jessica looking very serious about her bow project.
Kendra looking...
seriously happy! :)

Kendra showed us these super cute flowers that look like they are much harder than they actually are! And by the way, Kendra wins the award for getting me her link for her flower the fastest.  Thank you Kendra!! :)

Allison tried her hand at making a sweet satin rose that I've never seen before.  And it turned out really really pretty!

Seanie, my cute neighbor, showed us how to do a fun fabric flower....I can't find a tutorial for it on-line though. I'll keep looking...

Here's cute Allison and I.
I made this pic black and white because I had
a yucky rash on my neck and it's harder to tell like this! 
Ugh.  I couldn't figure out why my neck looked like
I had the plague. But now...I'm thinking
 I'm allergic to my moisturizer. 
Or maybe....it is simply the plague.
 Better keep back.

Jessica showed some really sweet flower clips made by singing the edges of satin.  Sundi demonstrated how to burn the edges. This is such a super easy technique with such fun results. It's a bit addicting!

Mikki (my super cute sis-in-law who I love and adore and who I wish I'd snapped a picture of before she had to run off to do homework :) showed how to make cute itty bitty fluffy flowers.


Heather and Cassidy working as a team on their crafts!


Shanna, Heather and Cassidy shared a bunch of clips they've been making.  They are like the rolled rosettes you see everywhere, but they tried making them with ribbons.  Oy!  I wish I'd taken more pictures!  They are really really cute.  Snap.

*Edited to add* Yay! Shanna sent me a picture of her clips! 
These are so sweet, right? It looks like she rolled the ribbon with pearls that you can buy by the yard (I've gotten them from Wal-mart). I love 'em.  I wouldn't have thought of useign the pearls like this. 


Kathy, a self-proclaimed non-crafty girl, showed how us how to make a cute (I think I need to find a new word for cute...I'm using it quite a bit in this post!) ribbon flower. I keep trying to suck her into the crafty world and so far I'm doing pretty good.  Skirts, a quilt, a tulle tu-tu and now hair clips!  Kathy, I'll convert you to the crafty-life yet. :)
 Kathy with her cute ribbon clip,
Shanna and wee Emmett. 
Kayli showed how to make a fun gathered flower. It was a really great simple idea that would be fun in all sorts of different fabrics.  Hmmm, I've tried searching for a tutorial on-line for it, too.  I'll have to keep looking.

 Mindy showed us a neat layered ribbon flower.  Lots of fun possibilities with it.  Snap. I tried to find a tutorial for it, but couldn't.


It was interesting how one idea seemed to show up in quite a few different ways.  I demonstrated how to make these flower puffs....


To make these you cut out about 8 round flower shapes, pick at them to make them fray, fold them in half and then in half again and then string them onto thread like garland.  Then once you have them all on the thread you loop it around to the first one and take a stitch, pulling it tight.  Then you fluff them up and attach to clips.  I will try to find time to put together a better tutorial than that brief explanation!


Sundi getting busy with a glue gun
and some fabric.
 

I love how they turned out!  The flower Mikki shared was similar, Allison brought one she had made that was basically the same idea (without the fraying) and Sundi....well, she showed how to make a clip like this but soooo much easier.  With glue!  I love it. 

Basically she cut out four big round flower shapes and four small ones.  Then she glued them all together and...Voila! So easy and cute. (hmmm....that explanation was somewhat lacking, eh?)She said she's going to make a little video tute.  And, thus, the anticipated waiting begins. I'll let you know when she puts together the theatrical masterpiece. (no pressure Sundi :)

Funny that four of us did something so similar, right?


As I was scouring the net for flower tutorials, I found some fun ones I'd like to try... 
T-shirt knit flower pom poms (I've got to try these.)


Scrappy Strip Rose (ok. This is seriously a really awesome flower.)

Folded Flower with a Covered Button

Felt Flower Ball (I love it with the little leaves. So cute.)

Another Felt Flower


And if you're looking for bow tutorials, I found a bunch here...

Boutique Hair Clips