Showing posts with label upcycled fun. Show all posts

Saturday, January 7, 2012

Ack! There's a Monster Eating my Head! {A Carnivorous Hat}


My oldest son, Weston had been eyeing all the funky winter hats. He especially liked the ones with ear flaps and the strings or braids hanging down with pom-poms.

Well, I aim to please! Coming up with a handmade gift to make him for Christmas was easy peasy.

I flew by the seat of my pants with this child-eating hat though. No one was more surprised than me when it actually turned out so good!

First I found a printable pattern for a hat with ear flaps (sorry! I can't remember where I found it....I was in the haze of holiday midnight crafting...) I cut the hat from a fifty cent sweater....yep, that's right. 50 cents!! I know. So cool. And, boy it was a pretty ugly one. I think the sweater is much happier being reincarnated into a hungry monster hat.

So, after I had the lining and outer hat pieces cut out, I added a row of fleece teeth and stuffed striped knit horns.

I braided three strips of fabric....two strips of the striped knit and one strip of green fleece and sewed those in before I put in the lining. Once it was all put together I added the eyes and the fleece pom pom to the top.  For the pom poms on the braids I unraveled the sweater. 


Weston....you look a bit too happy for one who is getting their head eaten though, dontcha think?


Ok. There's a little more terror. Thank you. (This shot was taken right after he opened it on Christmas morning...er....more like afternoon by the time we got home from church and back to the opening of presents! :)


Hmmmmm....we took a lot of pictures, didn't we? Well. We were having fun....


Oh my. This boy is so much fun. He didn't want me getting his jammies in the pictures at first. But then he decided he didn't care.


While making this hat, I had to plop it on my head every so often and race to a mirror. Then I'd giggle in happy anticipation of Weston opening it. And, boy....that was an awesome moment. He was THRILLED! That monster, Floyd (as Weston named him) perched on his head for probably three days straight. 


Sunday, November 13, 2011

Upcycled Sweater Dress Tutorial


Alright. So, I didn't take a before picture of this sweater. I know! So so so not cool. I cruised around the internet trying to find something comparable.

This is similar...

Dsc_0308
Source: Bonanza
Although you can see that the one above has a row of buttons on the front. And no hoodie. And, well, of course....it's brown.  Ok. This is as good as I could fine.  Moving on...

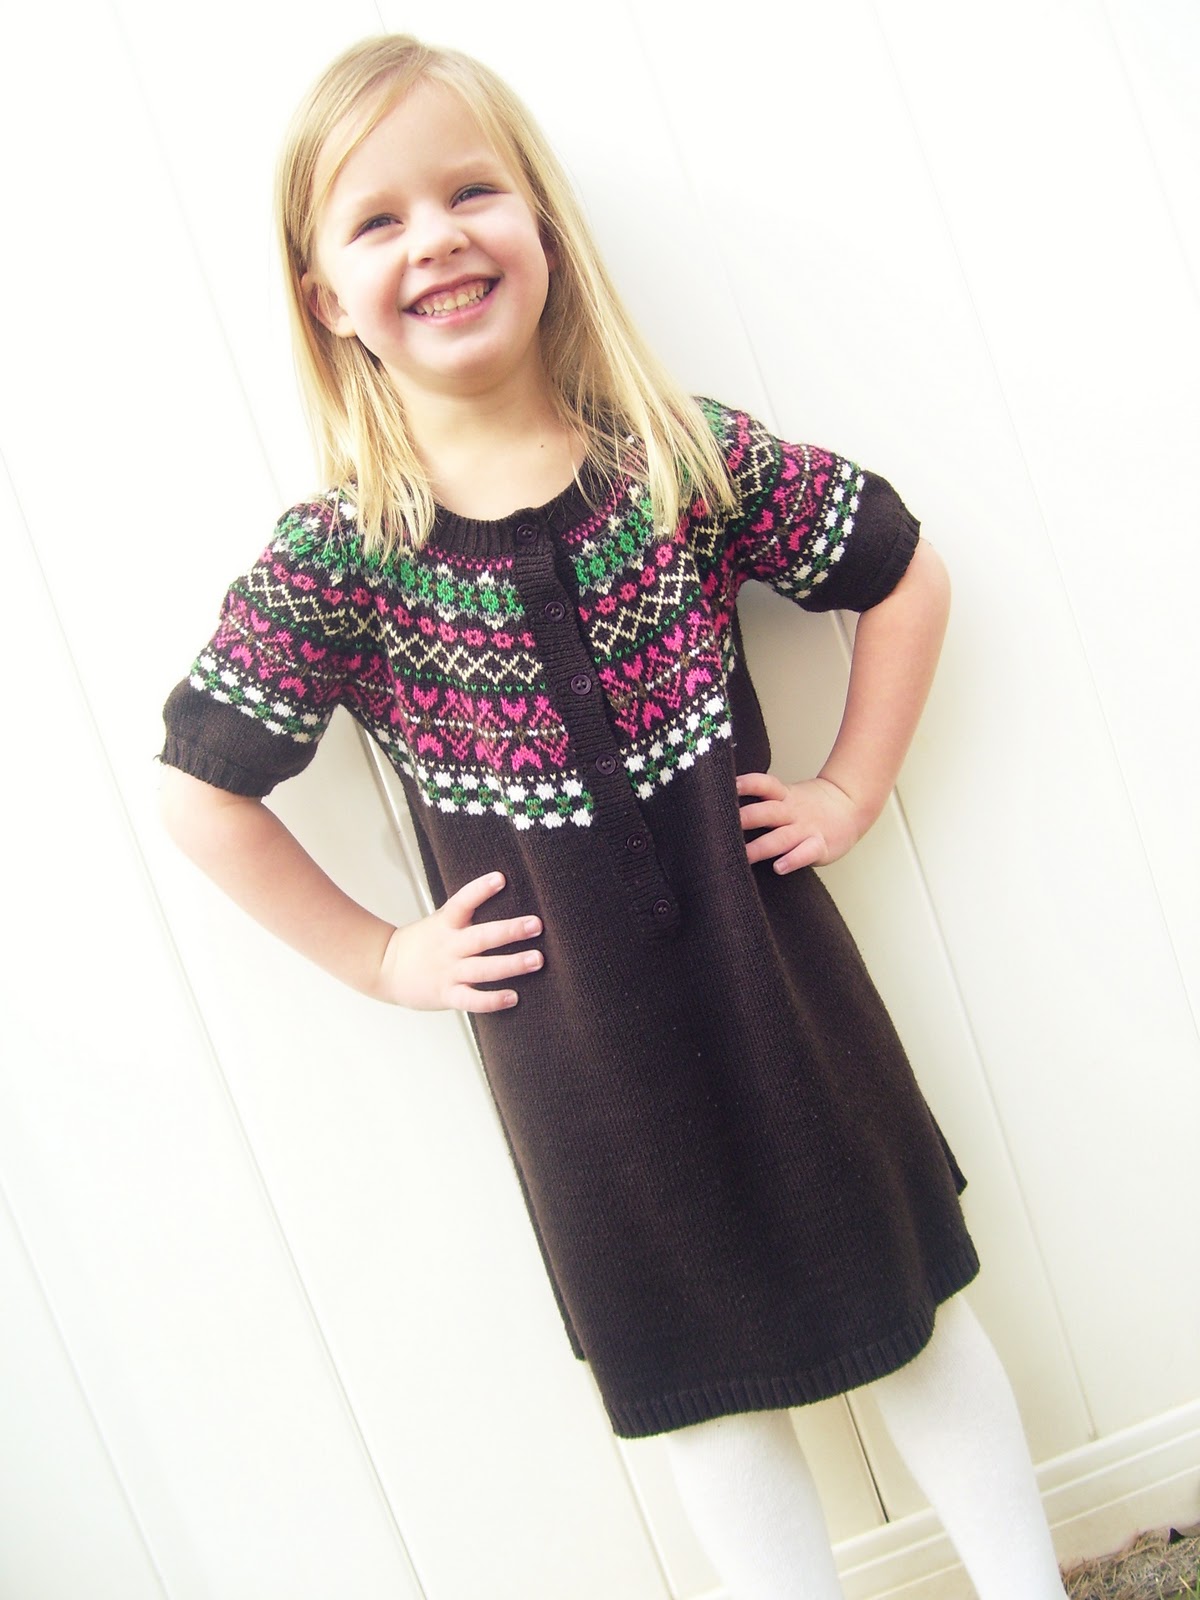
When I spotted it on the thrift store rack, it was love. I decided to make it into a dress for my wee girl. But I wasn't sure what to do about the big neckline which swamped her little shoulders.

Well, I started by taking it in on the sides and the sleeves all in one go. And also putting in a new seam along the shoulders from the neck to sleeve.  (First I turned it inside out and then pinned it where I wanted the new seams....and... let's hope I first tried it on her to see where I wanted the new seams to go....but I can't really remember.... I actually made this last year and when I finished it, it was too big on her and looked funny. I chalked it up to a Craft Fail. But then Zoe found it a few days ago, slipped it on and I realized it fit and looked good! Yay!)

So, I serged it from the sleeves to the hem and also from the neck to sleeves (is this making any sense?) and tried it on her. (I probably had to take it in a bit more on the sides....)

And then I pondered about that neckline. What to do...what to do?

Hmmmm, what about some darts? Yes. darts. I put one in each side. The Nordic design disguises them rather nicely, I think.

This looks a bit like the outline of a body at a murder scene. Poor sweater....


Can you see the new seam line and dart?
No clue what a dart is? Or maybe you're picturing some yellow foam Nerf darts and wondering how I put those into the sweater dress?  Well, let me help you out. Go check out this Dart Tutorial for more info.

This is a another pic of the new seam and dart, but from the inside.

And there you go. Ridiculously easy. 


A woman's sweater to little girl's sweater dress.  

Comfy.


Cozy.


And super cute. 


Monday, September 19, 2011

Easy Patchwork Top and T-shirt Leggings


I sewed up this super easy patchwork top as a dress for my smallest monkey a few months ago.  I tried using really wide elastic in the top casing. I thought it was a good idea but....erm....it made it too bulky for her small body. In fact, it looked just a wee bit strange on her. And it was way too long, too.  I have such a problem with getting the length right with dresses for my babies!


So, it's become a top for my older girl. And she was thrilled! The wider elastic doesn't seem too big on her. And she looks pretty darn cute in it, right? I especially like her choice of pink boots to complete the ensemble.

Her super crazy simple leggings are made from an upcycled t-shirt. I cut them out so the bottom of the pattern is lined up with the hem of the t-shirt. And then I don't have to hem the leggings. So incredibly easy. And I didn't even have to buy a pattern since I made one from a pair of leggings she already had. She has a bunch of these in fun stripes. I'm always on the look out for fun tees to upcycle into leggings.


I need to make some more of these for her and I'm thinking of putting a tutorial together. If you're interested, let me know. I'm more likely to do it if there are actual readers who want me to!


I've also jumped on the cute ruffley pants train. I've got to finish a few up and I'll post pictures soon. They're so fun!

Friday, March 4, 2011

Upcycled Tea Tray Tutorial

Oh, how my wee Zoe loves her tea set. We have countless tea parties where we pretend to sip cup after cup of hot cocoa.

And when her tea set is all set up on her pink table, she even manages to convince her older brothers to stop for a spell and have a cup of hot cocoa with her.

So, when I came across this tray I knew it was destined to become part of our tea party fun.


First we roughed it up a bit with some sand paper. Then we painted the side pieces of the tray.   I let Zoe pick the color. Of course, she chose...


Pink. This girl would live in a Pink World if she could manage it.

Since we were planning on covering up the bland paper in the bottom, it didn't matter if Zoe wasn't the most accurate painter. It would be much much easier to use spray paint on this project (for some of the reasons why spray paint is totally awesome, check out this fun post by my friend Sundi) but I opted for just the regular ol' acrylic craft paint. Because #1: It let Zoe be involved and #2: I didn't have any hot pink spray paint on hand. We used that all up on her little tea table.

I had some fun scrapbook paper for the tray down in my Pit of Despair (otherwise known as my sewing room/office) so I measured the tray, cut the paper to size and we spread some Modge Podge on the bottom of the tray and slapped it down, spreading it out all nice and neat. 

But the tray is wider than twelve inches, so we also had to add a border of a coordinating paper. Then we covered it all with another layer of modge podge. 


Then I lightly sanded the corners and edges of the tray, roughing it up a bit. Ryan sealed it with a clear coat spray (which I could have done myself, but he's just nice like that) and after it dried it was ready to play with!


You can't see her sparkley cape so good in this picture. 


She is also sporting a very nice cat mask. Yep, not just everyone gets to have a tea party with Super Kitty Cat and her doll, Pinky. :)